
May 9, 2016
I’ve been conducting an outdoor portraiture workshop as part of a class I teach at the Flower City Arts Center. This class is less about posing and more about lighting.
This first outdoor session was at Ellison Park and started around 11am. While there was some sporadic cloud cover, most of the time there was just bright harsh sun light and the worst possible time of day to take outdoor photos. The object of this workshop was to teach the proper use of a hot-shoe flash to mitigate the harsh lighting conditions that a noon-day sun presents. Other than some slight cropping, there was absolutely no post-processing of any of the images.
I took the first few photos as examples and used an ambient light meter (not in camera) to measure the light. With the ISO set to 200 (lowest common denominator for the cameras being used) the exposure was 125 sec. @ f/16. I was not using a flash diffuser but did have a 1/4 CTO filter attached. White Balance (WB) was set to Full Daylight and the 1/4 CTO filter added just a tiny bit of warming.
During this session the cameras were set to manual and the flash was set to TTL. The primary in-camera metering mode was Spot and manual pre-flash was used.
The photo below was taken with the sun behind and to the right (my left) of the subject. The advantage to shooting into the sun is that the subject is not squinting. 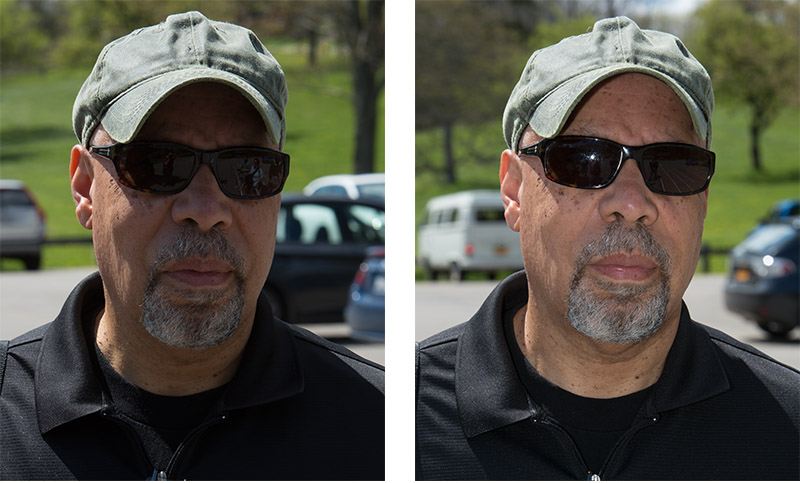
The Photo on the Left – was taken with no flash. While the exposure on his right cheek is good, there is way too much shadow on the rest of the face. This s not a very good shot.
The Photo on the Right – was taken with the flash on and set to minus 1-stop. As you can see, it’s a much more pleasing photo. The main light is still on the left side of the face but the harsh shadow has been significantly reduced.
This next photos were shot with the sun in the face of the subject. The camera setting were exactly the same as the previous set of photos.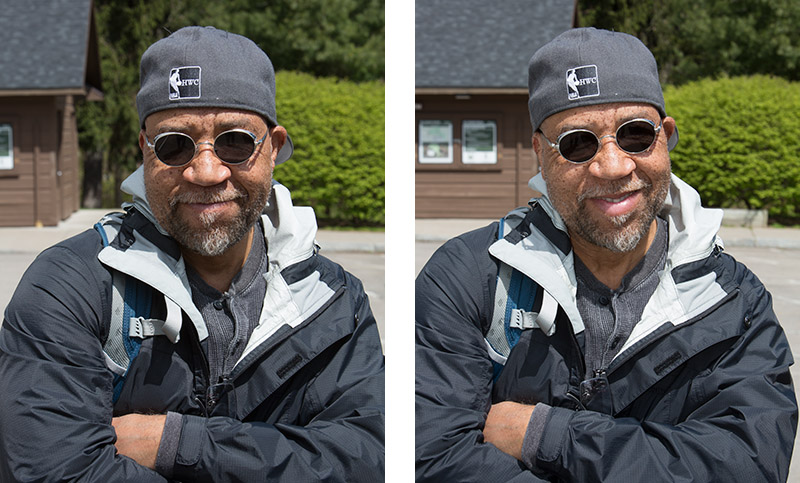
The Photo on the Left – was taken with no flash. While no in-camera metering was used, if it had been, I’d spot-meter on the nose. The overall exposure is good, but the shadows are a bit harsh and deep, especially under the nose and chin.
The Photo on the Right – was taken with the flash on and set to minus 1-stop. As you can see, it’s a much more pleasing photo since the harsh shadows have been reduced. I could have further reduced the shadows by reducing the flash to 1/3 or 2/3 stops as opposed to a full stop. It’s all just personal preference.
The rule of thumb is to always shoot into the light since that’s something you have very little control over. You can control your flash but controlling the sun is another matter and waiting for clouds may not be an option.
This next 3-frame series was taken in the shade with the initial exposure determined by the background. The initial exposure was 125 sec/, f/11 and the flash was set to zero (0) compensation since I wanted to match and control the background light.
In order to control the background exposure, I closed my aperture by a whole stop between the three shots, this made the sky look darker that it really was. I could of just as easily changed my initial aperture to f/8 to make the background brighter.
125 sec. f/11 125 sec. f/16 125 sec. f/22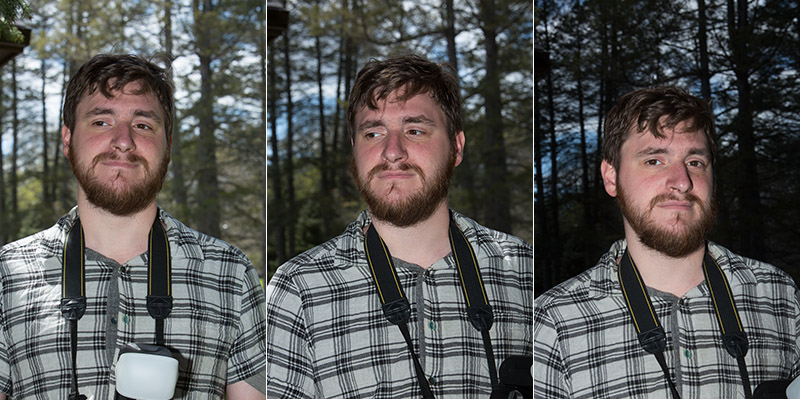
In all cases my camera’s metering system was set to spot and I used it, along with my camera and flashes FEL (Canon) FVL (Nikon) pre-flash function, to control the output of the flash system.
The next outdoor session will be more of an evening event taking advantage of much compressed dynamic range and a setting sun.
